How to Change Your Name on Facebook
according guidelines and rules

Has your name changed?
Do you know that you could change your name on Facebook website as well.
Remember, after you made a change you can't change it again for 60 days.
There are different reasons why people want to change their names. The nice one marriage, or users feel unsafe to reveal their true identity, or teachers want to hide from students, or users service in police and do not want to be targeted.
Hopefully it is an easy process, just be sure you really want this and remember:
- This social media rules do not allow using symbols, numbers, some characters, punctuation marks, and inappropriate words or phrases
- In 2017 hackers injected a Unicode bug in the application and were able to spread malware to Windows computers
- It is recommended to review social network name standards
To change Facebook name - Step by Step Guide
1. Login to your Facebook account with your username and password
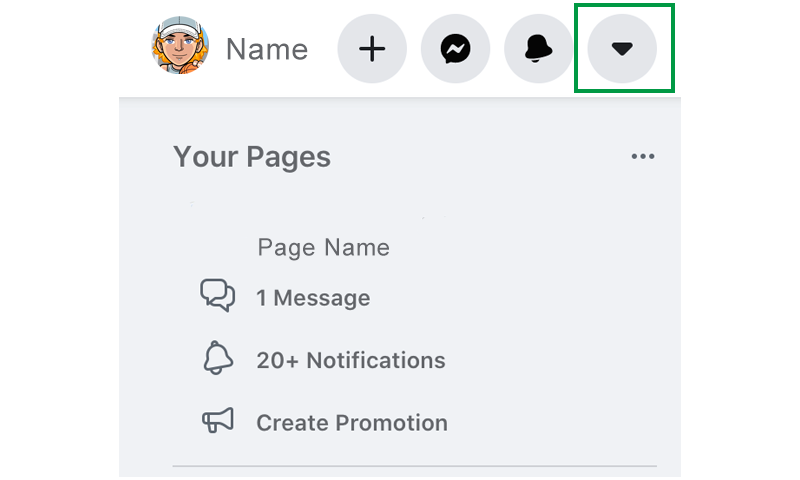
2. Click in the top right corner triangle icon to get to general account settings
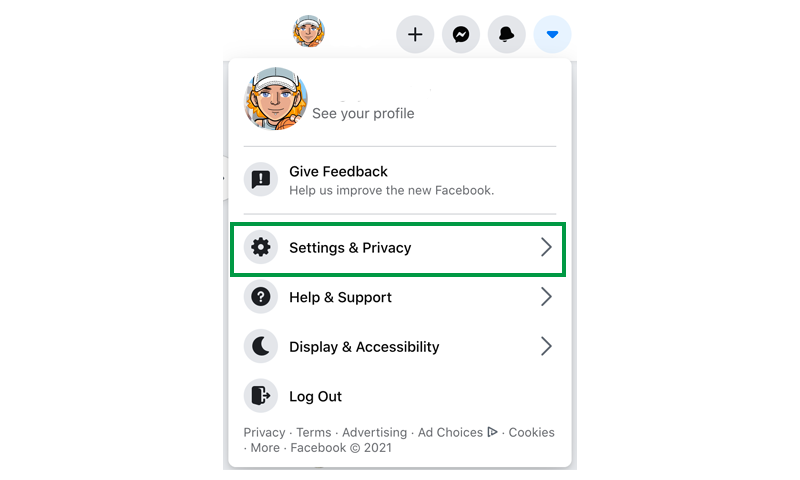
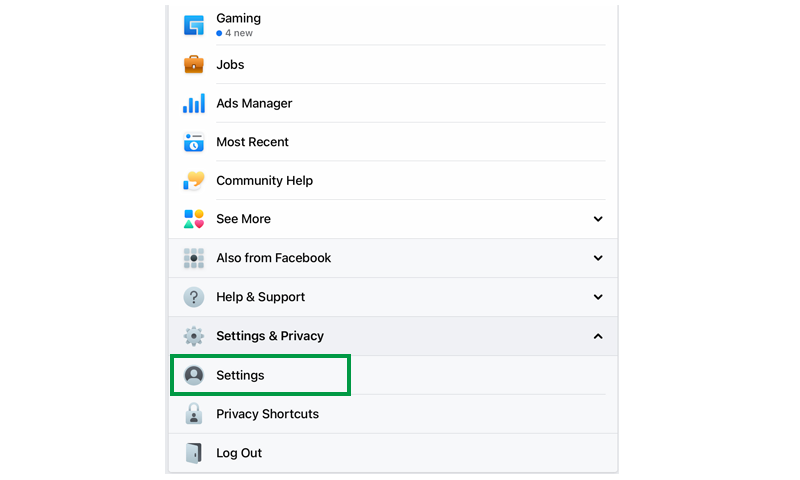
3. Select Settings and Privacy
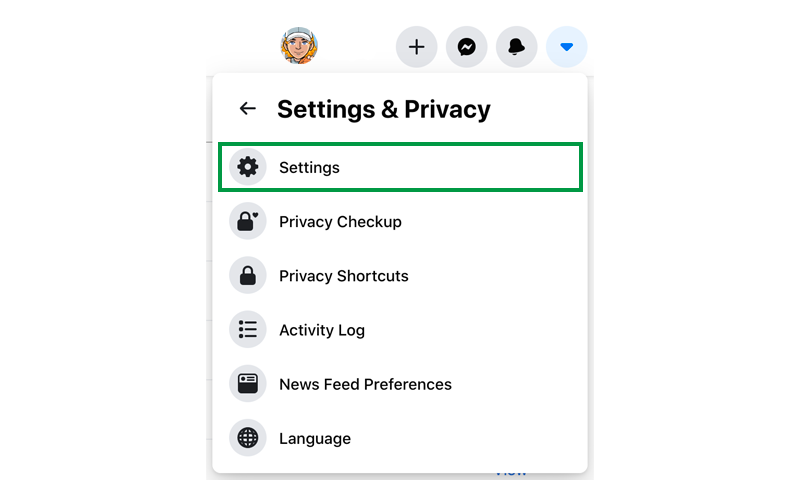
4. Select Settings
5. Click the blue edit icon on your current name
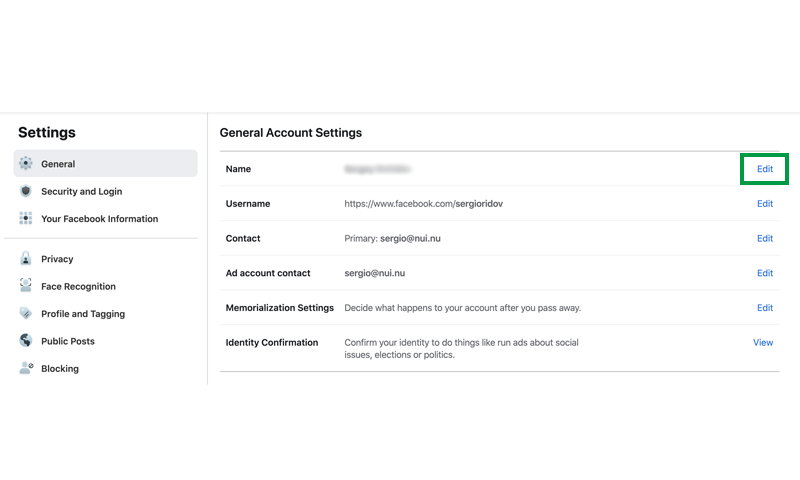
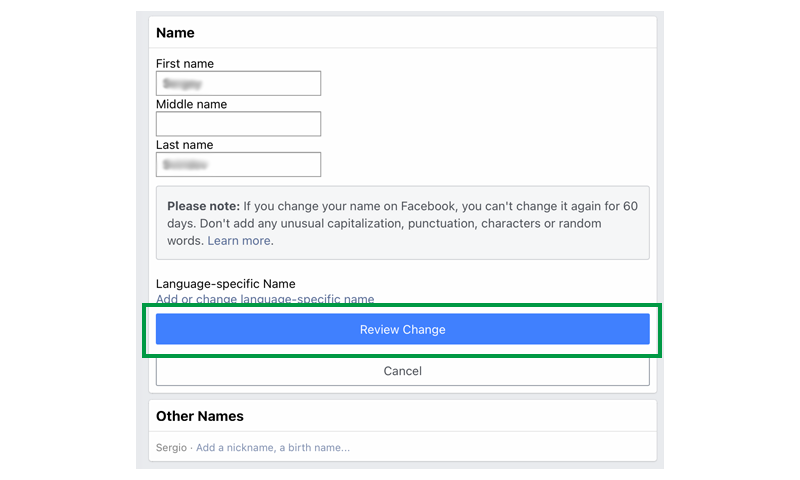
Now you are at the most important point of the process. At this stage you can change your first name, last name, and middle name. There is also an option to change another names, in case you use a nickname in your profile.
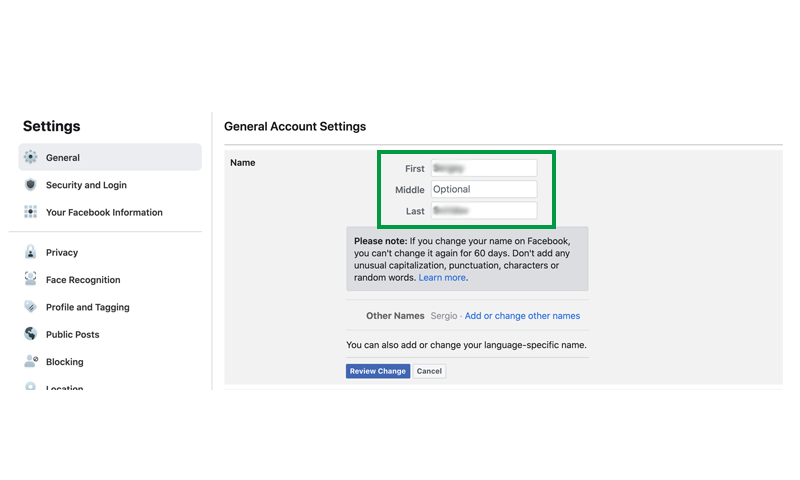
6. Enter new name
7. Click review changes
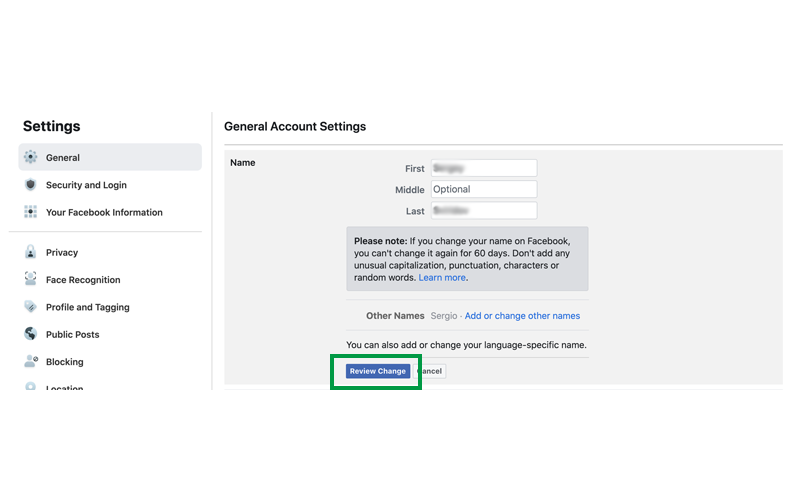
6. Enter new name
8. Enter your password and click save.
How to Change My Facebook Name on a Smart Phone
1. Open the open Facebook app.
2. Click the three lines icon in the bottom-right side on iPhone or at the top-right side on Android to pull out dropdown menu it looks like horizontal lines.

3. Scroll down until you see Setting and Privacy click
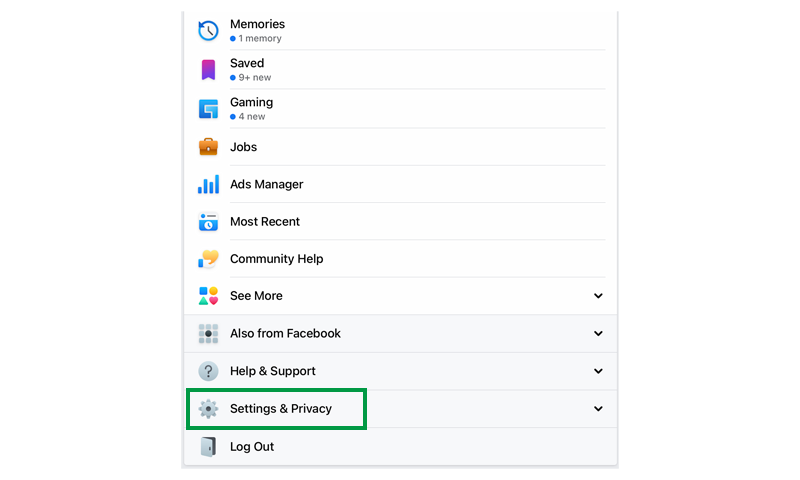
4. In Setting and Privacy click Settings
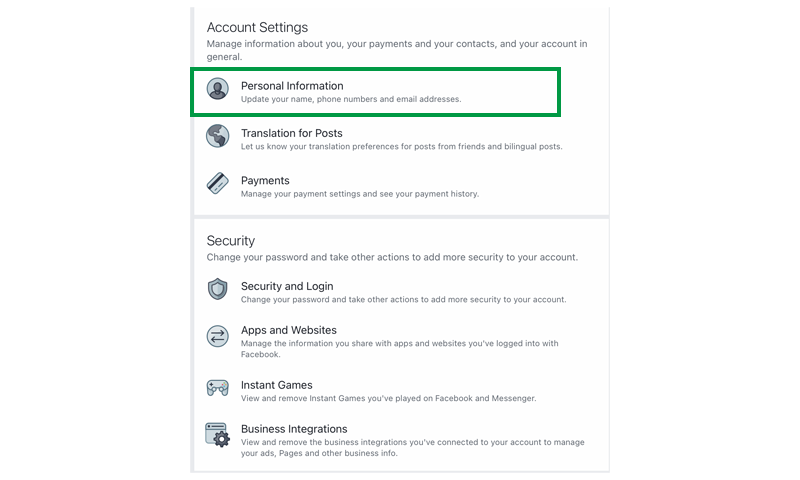
5. In Settings click Personal Information
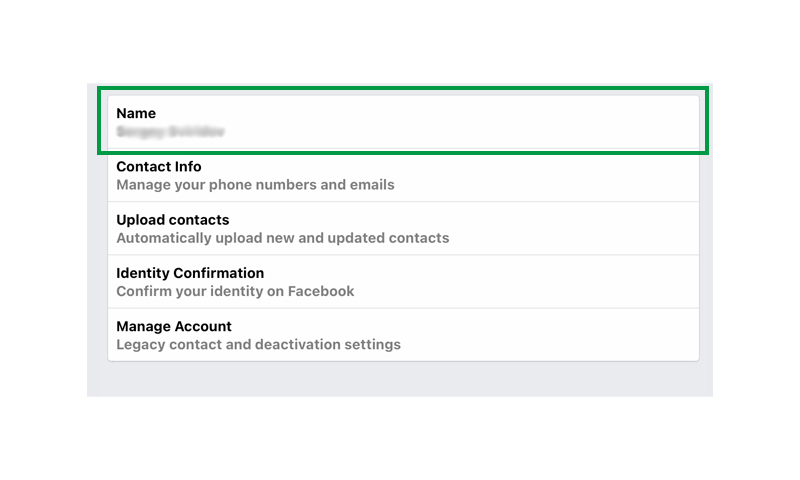
6. In Personal Information click Name
7. You get to the screen where you could change your name, add or change language specific name, add nickname.
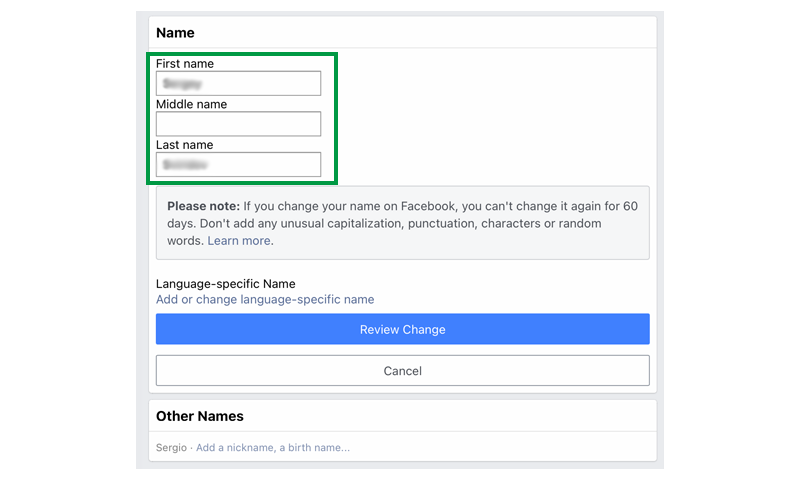
8. Click Review Changes, confirm your choice with save changes button.
Congratulations you have successfully changed your Facebook name.
Tags: Social
Sergio Sviridov
Information Delivery Specialist
